How to install Kali linux in Virtual box on windows 2021.1 latest version
Introduction
Kali Linux is a Debian-derived Linux distribution designed for penetration testing. With over 600 preinstalled penetration-testing programs, it earned a reputation as one of the best-operating systems used for security testing. As a security-testing platform, it is best to install Kali as a VM on VirtualBox.
Kali has a rolling release model, ensuring up-to-date tools on your system. Also, there is an active community of users providing ongoing support.
This step by step tutorial shows you how to install Kali Linux on VirtualBox.
Prerequisites
At least 20 GB of disk space
At least 1 GB of RAM (preferably 2) for i386 and amd64 architecture
You can Download Kali linux in VirtualBox seeing video or Photos
Create Kali Linux VirtualBox Container
After downloading the iso image
Wizard
Launch VirtualBox Manager and click the New icon.
Name and operating system. A pop-up window for creating a new VM appears. Specify a name and a destination folder. The Type and Version change automatically, based on the name you provide. Make sure the information matches the package you download
Memory size. Choose how much memory to allocate to the virtual machine and click Next. The default setting for Linux is 1024 MB. However, this varies depending on your individual needs.
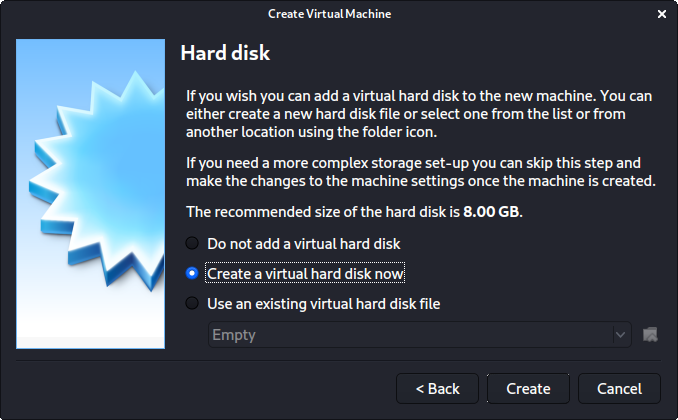
Hard disk. The default option is to create a virtual hard disk for the new VM. Click Create to continue. Alternatively, you can use an existing virtual hard disk file or decide not to add one at all.
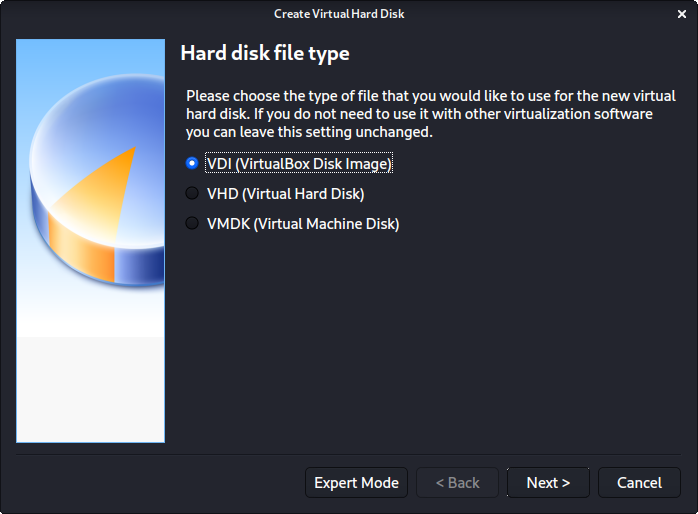
Hard disk file type. Select default file type for the new virtual hard disk, VDI (VirtualBox Disk Image)
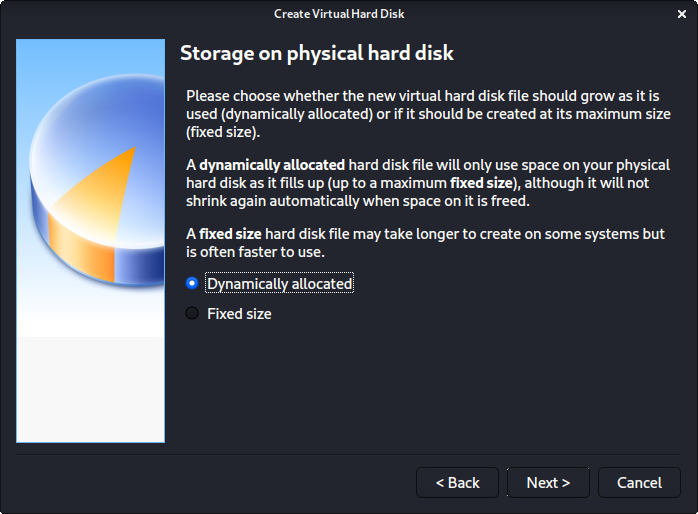
Storage on physical hard disk, go with the default option of Dynamically allocated.
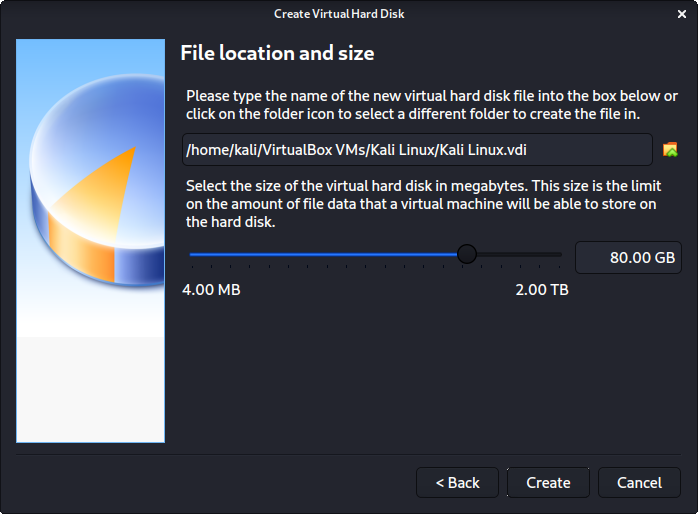
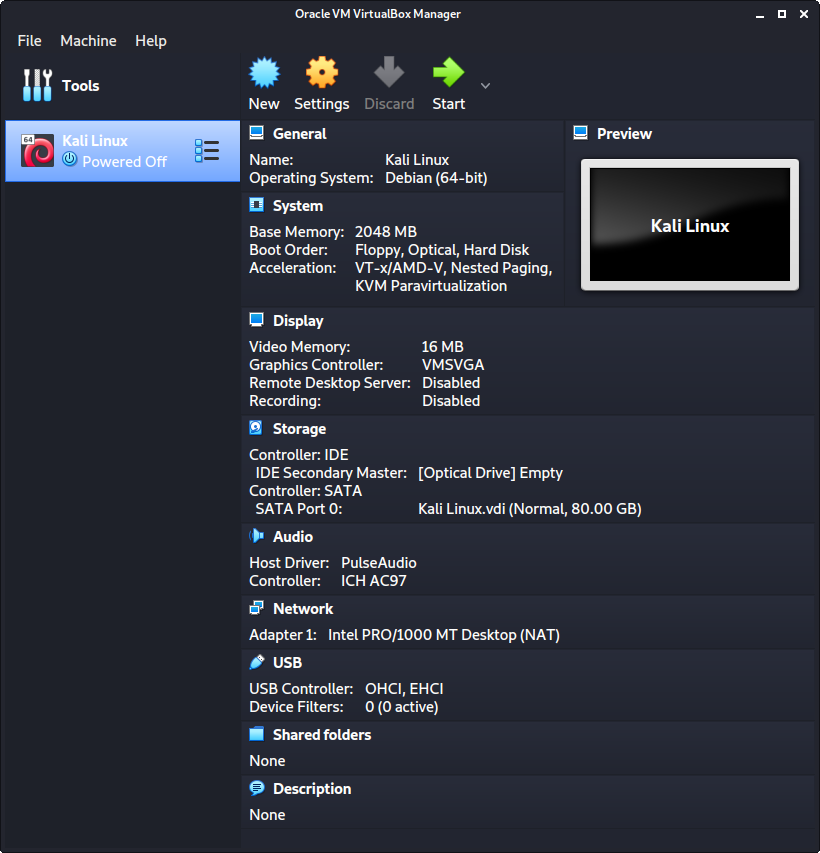
File location and size, we can now define large the virtual hard disk will be. We use 80.00 GB for our VMs.
After clicking on “Create”, the wizard is complete.
Configure Virtual Machine Settings
Select a virtual machine and click the Settings icon. Make sure you marked the correct VM and that the right-hand side is displaying details for Kali Linux.
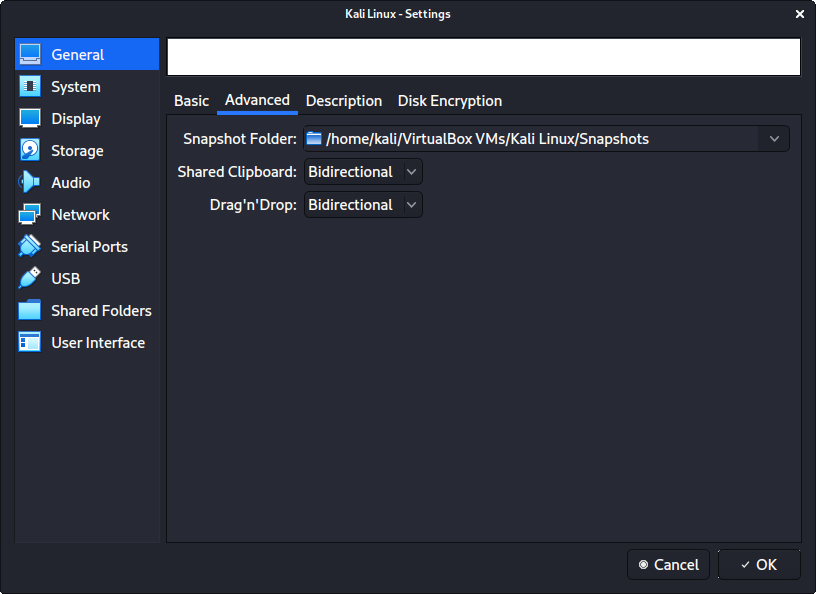
In General – Advanced, we make sure to set ‘Shared Clipboard’ to bidirectional, as well as Drag’n’Drop to bidirectional
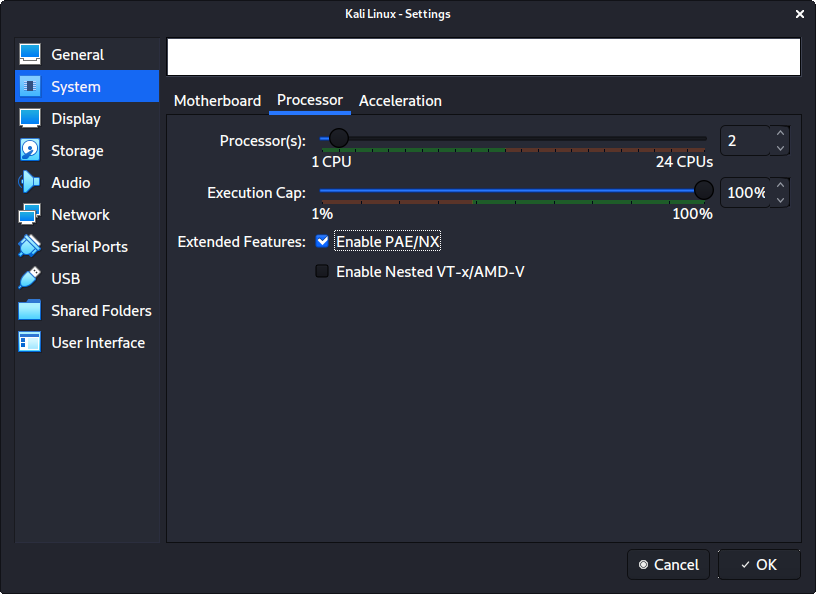
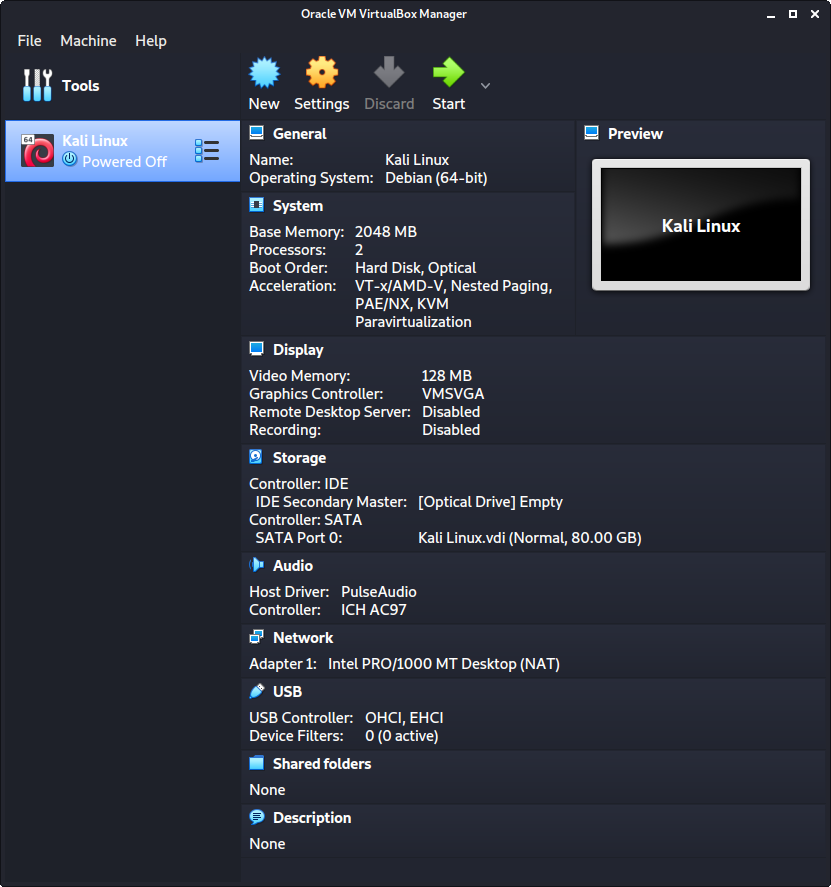
In System – Processor, we increase the Processors to be two (2).
Finally, navigate to Storage settings. Add the downloaded Kali ISO image to a storage device under Controller: IDE.
Click the disk icon to search for the image. Once finished, close the Settings window.
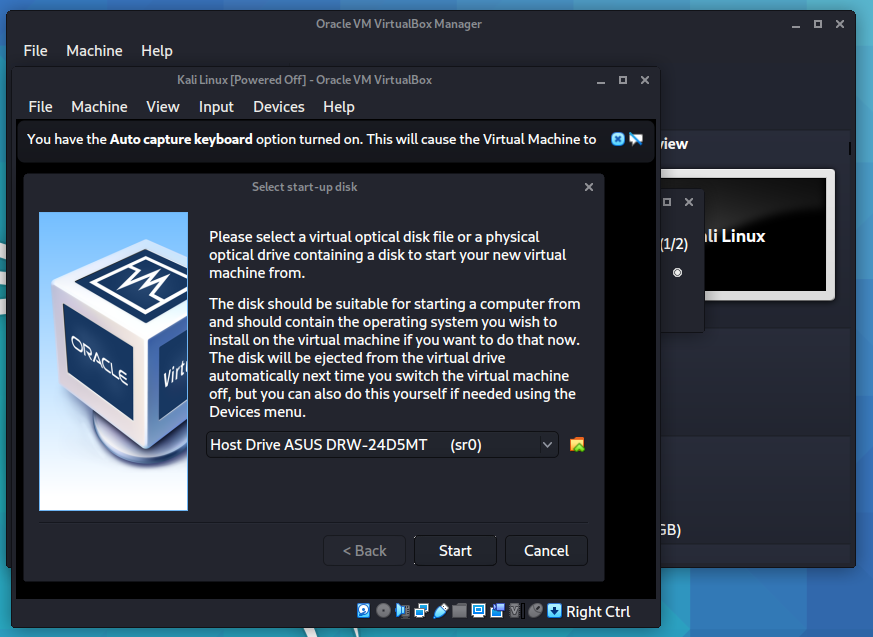
Click the Start icon to begin installing Kali.
Click on the Start button to start the kali Linux on VirtualBox
You can watch full video on Top of this page or in my Youtude channel
Conclusion
With this tutorials, you have learned how to install Kali Linux in VirtualBox.
Checkout for more videos on site
or
YouTude channel : https://www.youtube.com/channel/UCQcdY8YCichg5-bOgdNR23g


